How To Make A Custom Sign – Pursuit Sign Construction
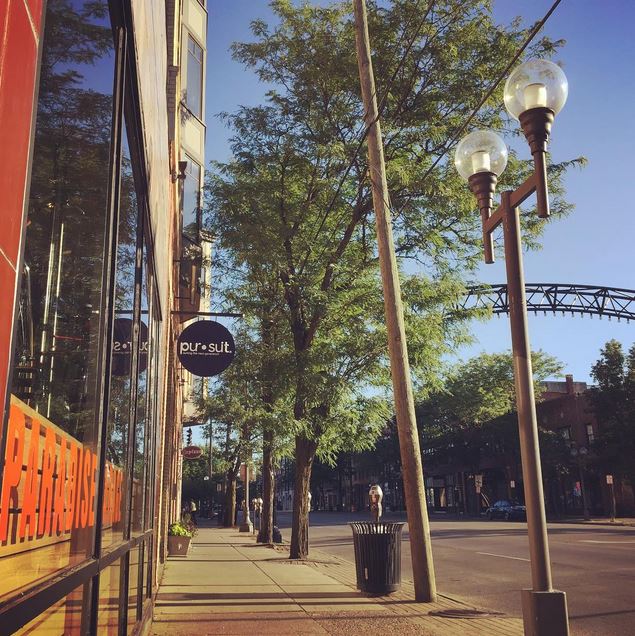
We recently completed the construction of a custom sign for the new Pursuit retail store on High Street. Check out the behind the scenes look at what it takes to make a custom sign.
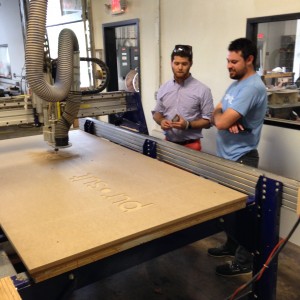 |
1. Start with an appealing DesignWe designed the Pursuit sign to match their brand standards and stand out at the new High Street location. We used the CNC at The Columbus Idea Foundry to cut the logo and circle out with precision! |
|
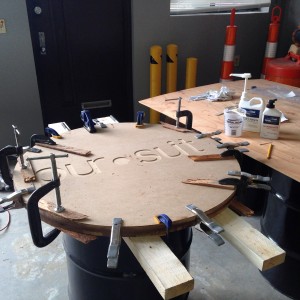 |
2. Assemble the PiecesNext we glued the parts and pieces with marine grade epoxy. The sign will be double sided, so we took extra care in squaring the text, and epoxying everything together just right. |
|
 |
3. Epoxy, Sealer and PrimerTo make sure the sign would last, we completely sealed it with several coats of epoxy. Next, we smoothed the surface with fairing compound, and primed all the surfaces that will be painted. |
|
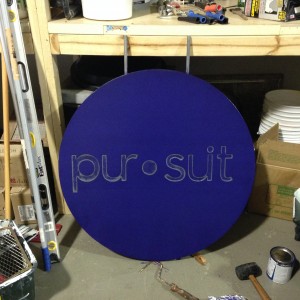 |
4. PaintThe paint was custom matched to the exact brand colors of Pursuit. We applied several coats of outdoor paint to achieve full coverage and add another level of protection. |
|
 |
5. More paint and AcrylicFinally we added the Acrylic lettering that was cut on the laser at The Columbus Idea Foundry. Next we made a stencil to paint on the smaller lettering to complete their custom sign. |
|
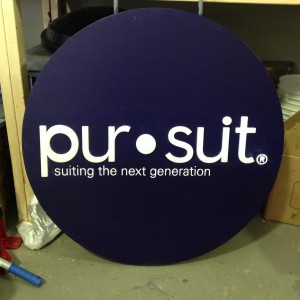 |
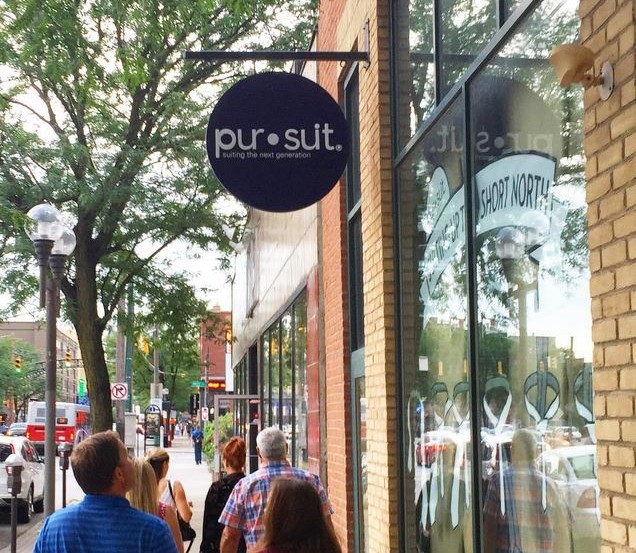
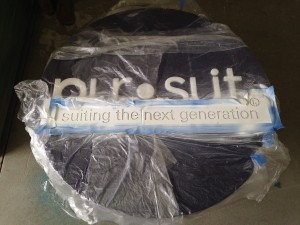
6. Finish and HangAfter pealing all the tape and plastic away, the custom sign was complete and ready to hang. We hung the sign just in time for the August, Short North Gallery Hop! |
For more information about Pursuit, check out their website, or follow them on Instagram.
Have an idea for a project? Let us know about it.
Tags: behind-the-scenes, commercial construction, Compton Construction, Construction, custom build, custom sign, Design Build, general contractor, Renovation
